
Download Article
Download Article
- Collecting Resources
- Crafting the Cartography Table
- Editing Maps with the Table
- Tips
- Warnings
|
|
|
|
In Minecraft, you can use a cartography table to expand, make copies of, and lock maps so you can see where you are in the world. Once you learn how to make a cartography table, using it to work on maps is easy. We’ll show you which resources you’ll need to craft a cartography table in Minecraft, and how to use the cartography table to edit Minecraft maps.
-

Look for light green stalks of sugarcane growing 1–4 blocks tall around water. When you find some, click or hit the bottom block in the stalk to make it drop a resource. Collect 3 sugarcane from different stalks so you have enough to craft your paper later on.[1]
- If you’re playing in Creative Mode, you don’t have to collect sugarcane. You can find it in your inventory under the Miscellaneous tab.
-
You can use any type of wood to make a cartography table, so it doesn’t matter what type of wood you use. Find a nearby tree and hold down the Attack button to hit one of the wood blocks until it breaks. Collect the wood resource that drops from the tree to add it to your inventory. Find and destroy another wood block the same way.[2]
- You can cut through wood faster if you equip an ax before you start hitting the block.
- If you’re playing on a computer, the left mouse button is Attack. If you’re on a console, hold the right trigger down. On mobile, hold your finger down on the block you want to destroy.
Advertisement
-
Your inventory shows you all the items you’re holding on the bottom and a 2 x 2 crafting square on top. If you’re on a computer, press E to open your inventory. On mobile, tap on the 3 dots at the bottom of the screen. If you play on a console, check the game menu to find the controller layout.
- If you’re playing in Survival Mode, make sure you’re in a safe place when you access your inventory so you don’t get attacked.
-
Take both of the wood blocks you collected from the trees and set them in the same square at the top of the inventory. It doesn’t matter which square you use as long as you only use one. Look to the right of the crafting squares to find the planks made from the wood. Select the planks and drag them into your inventory.[3]
- Each wood block will make 4 planks.
- You can immediately access planks in the inventory if you’re playing in Creative Mode.
-
Select 4 of the planks you just made from your inventory and drag them back up to the crafting squares. Drop 1 plank into each of the 4 crafting squares. After you place the fourth plank, a crafting table will appear on the right side. Place the crafting table in the bottom row of your inventory.[4]
- Crafting tables have a 3 x 3 crafting area so you can make more complicated materials.
-
Exit out of your inventory and cycle through your items until you see the crafting table in your hand. Choose a spot in the world where you want to place your crafting table and right-click to set it down.[5]
- If you’re playing with a controller, place the crafting table with the left trigger.
- If you play the Pocket Edition on mobile, simply tap on screen where you want to put the table.
-
Open the crafting table with the right mouse button on the computer or left trigger on a console. Take the sugarcane out of your inventory and place them in a 1 x 3 horizontal row in the crafting boxes. Once you place the last sugarcane, 3 pieces of paper will appear on the right side of the interface. Select the paper and drag it into your inventory.[6]
- It doesn’t matter which row you use to craft the paper.


Advertisement
-
If you’re on a computer, click on the crafting table with the right mouse button. When you’re using a controller, aim at the crafting table and pull the left trigger. If you play on mobile, quickly tap the crafting table to open it.[7]
- You cannot make a cartography table using basic crafting in your inventory.
-
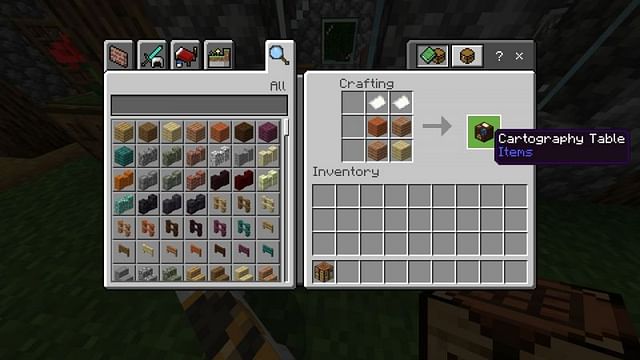
Take the leftover wood planks you have in your inventory and drag them up to the crafting squares at the top of the screen. Place 2 of the planks in 2 crafting squares in the bottom row. Then put the remaining 2 planks in the squares in the middle row so they’re directly above the first ones.[8]
- You can mix and match different planks if you don’t have ones that are all the same. The cartography table will look the same no matter what type of planks you use.
-
Take 2 pieces of paper from your inventory and drag them up to the top row of crafting squares. Place a sheet of paper in each of the squares directly above the planks. A cartography table will appear to the right of the crafting squares when you’re finished. Click on the cartography table and drag it into your inventory.[9]
-
Exit the crafting table and cycle through your items until you’re holding the cartography table. Choose a place in the world where you want to place the table. Use the left mouse button or right trigger on a controller to set the table down.[10]
- If you’re in Survival Mode, place your table inside a home or structure so you don’t get attacked while you’re using it.


Advertisement
-
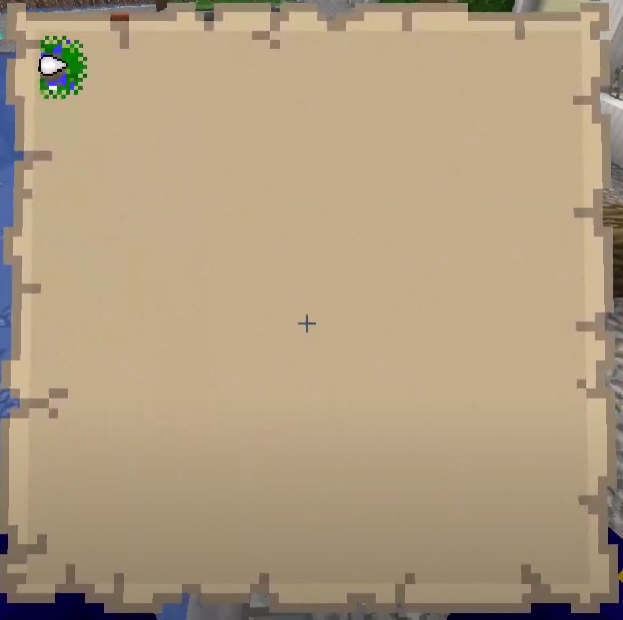
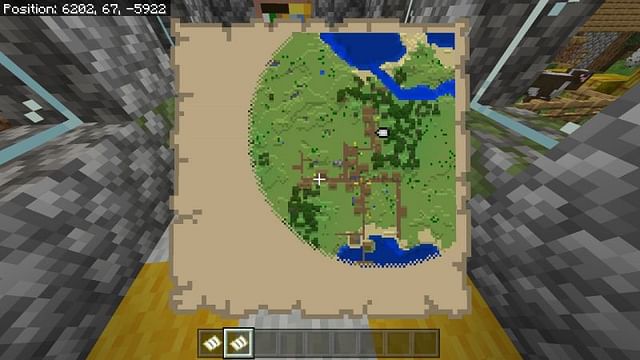
If you’ve already filled a map from exploring, you can expand it to show more of the world. Open the cartography table and place the filled map in the top slot. Then drag a piece of paper into the bottom slot of the table. The image on the right side of the screen will show your map with extra space around the edges. Click the map icon on the right side and drag it into your inventory for the newly expanded map.[11]
- You can expand a map a total of 4 times.
- You cannot expand a map if it’s still empty.
- If you don’t have a map, you can craft one on your crafting table by placing a compass in the center square and surrounding it with 8 pieces of paper. Otherwise, you can find an empty map in the inventory if you’re in Creative Mode.
-
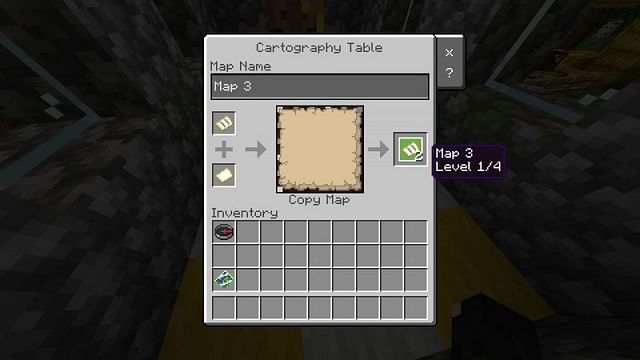
Access the cartography table and place your filled map in the top slot on the left side of the menu. Then place a second empty map in the bottom slot. The image on the right side will show 2 copies of your map. Select the 2 maps to the right of the image and drag them to your inventory. That way, you can have 2 maps that are exactly the same.[12]
- If you’re playing multiplayer, you can give your friends a copy of the map. When you use your copy, you’ll be able to see your friend’s location in the world.
-
If you want to preserve your map so it doesn’t update to new landscapes, you can lock it. Place the map you want to lock in the top slot of the cartography table. Then put a glass pane in the bottom slot. A small lock icon will appear in the corner of the map on screen. Take the map from the right side of the menu and drag it to your inventory.[13]
- If you are in Survival Mode, you can make glass panes by placing glass blocks in the bottom 6 squares of a crafting table. Otherwise, you can find it in your inventory in Creative Mode.


Advertisement
Ask a Question
200 characters left
Include your email address to get a message when this question is answered.
Submit
Advertisement
-
You can find a cartography table in your inventory if you’re playing in Creative Mode so you don’t have to craft it.
Thanks for submitting a tip for review!
Advertisement
-
Maps will only update or change if they’re unlocked and you’re carrying them with you.[14]
Advertisement
About This Article
Thanks to all authors for creating a page that has been read 34,903 times.
Did this article help you?
Мир Minecraft огромен, однако не безграничен. В таком случае заблудиться довольно легко, особенно новичкам, которые не всегда отмечают свой путь. К счастью, они могут создавать карты, на которых можно указать свое местоположение, а также показать окружающую местность. Это включает в себя даже рельеф местности и любые созданные структуры, что может быть очень полезно.
Интересно, что карты немного отличаются в Java и Bedrock-версиях Minecraft, несмотря на то, что выполняют они одну и ту же задачу. Кроме того, они могут быть изменены, чтобы показать больше или меньше местности, в которой находится игрок.
Если игрокам Minecraft требуется немного больше информации о работе карт, то их можно изучить, ведь эти полезные материалы гораздо более глубокие, чем может показаться на первый взгляд.
Что нужно знать о картах в Minecraft 1.20.1
Изготовление

В Java Edition карту можно создать, объединив восемь листов бумаги и компас в интерфейсе верстака. Однако в Bedrock Edition можно создать два отдельных типа карт. Рецепт, используемый в Java Edition, создает так называемую пустую карту-локатор, а замена компаса на бумагу приводит к созданию обычной пустой карты.
В Minecraft Bedrock игроки также могут создать карту, положив один лист бумаги на стол картографа, с дополнительным компасом, чтобы преобразовать ее в карту-локатор. Этот вариант может быть наиболее предпочтительным для тех, у кого есть этот стол и кто хочет сэкономить ресурсы. Любители также могут взять существующую карту и добавить компас на наковальне, чтобы превратить ее в карту-локатор.
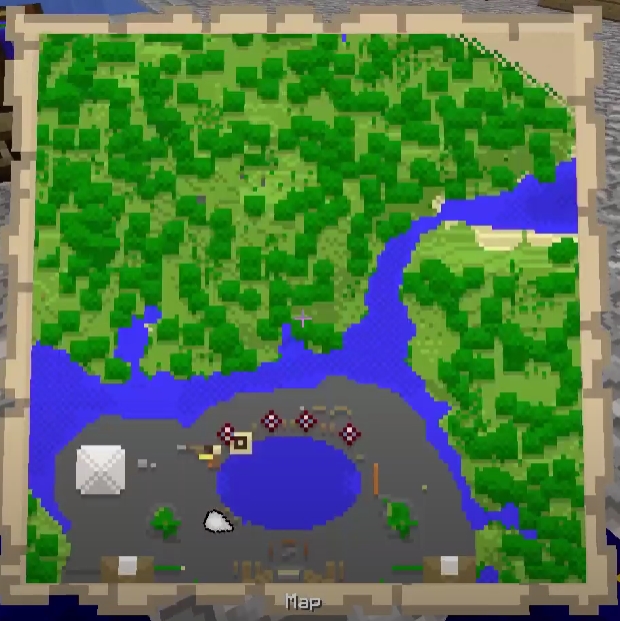
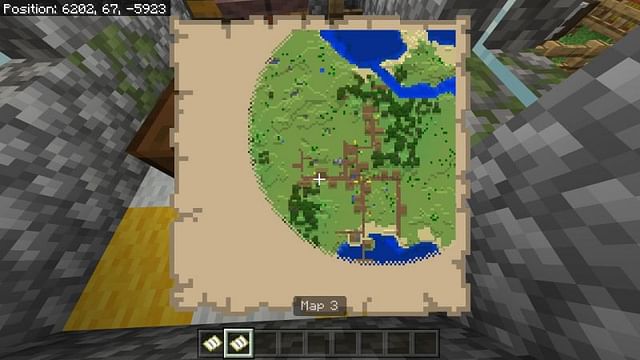
После того как карта будет взята в руки и использована, она сгенерирует близлежащую местность и строения в области размером 128×128 блоков. Игроки также заметят, что их местоположение в зоне отмечено стрелкой. Однако в Bedrock Editon она отображается только на картах-локаторах, а на стандартных картах нет никаких маркеров, обозначающих местоположение игрока.
Кроме того, если игрок выйдет за пределы области размером 128×128 блоков, которую содержит карта, его маркер исчезнет с карты.
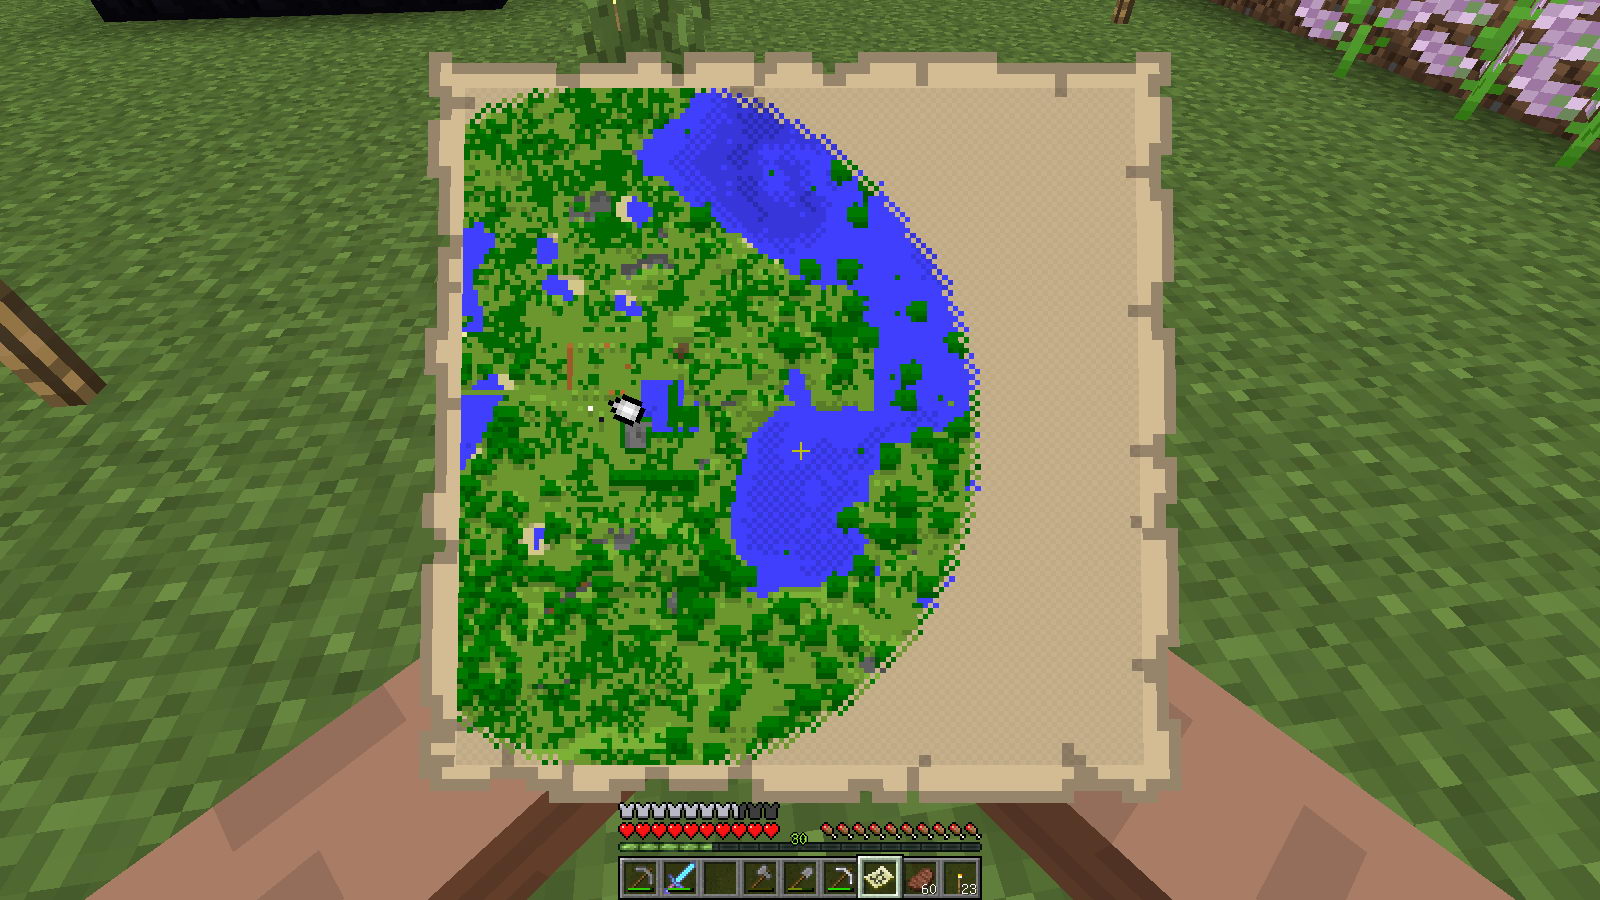
Масштабирование

Благодаря столу картографа обычная карта или карта-локатор может быть увеличена в размерах. Для этого нужно совместить карту с листом бумаги на столе. При желании игроки Minecraft могут дать ей название, а максимальный уровень карты может достигать четырех.
Уровни карт и радиус их охвата:
- 0/4 — 128×128
- 1/4 — 256×256
- 2/4 — 512×512
- 3/4 — 1024×1024
- 4/4 — 2048×2048
Кроме того, в Minecraft: Bedrock Edition можно взять карту и положить ее на наковальню, чтобы объединить с листом бумаги. При этом уровень предмета также успешно повышается. Следует также отметить, что перед расширением карты на ней должно что-то быть, так как пустые карты не могут быть увеличены.
Клонирование и блокировка

Иногда одной карты бывает недостаточно для выполнения задач игрока. Может быть, нужна дополнительная, чтобы украсить стену рамкой для предметов, или идентичная для совместного использования в многопользовательской игре. Как бы то ни было, игроки могут с легкостью клонировать карты на столе картографа.
Соединив использованную карту в столе картографа с пустой, можно создать копию того, что изображено на оригинальной карте. Более того, можно добавить стеклянную панель к карте на том же столе, чтобы заблокировать ее, предотвратив дальнейшее использование. Это позволяет скрыть базу или часть карты, которую игрок хочет сохранить в тайне.
Наверх
Стол картографа это инструмент в котором вы можете работать с картой. При помощи стола картографа можно: уменьшать масштаб карты, копировать и ламинировать карту. В этой статье рассмотрим все основные функции стола картографа и научимся ими пользоваться.
Основные функции стола картографа
В первую очередь Вам необходимо сделать саму карту на верстаке. Для этого понадобиться:
- 8 бумаги;
- 1 компас.
Уменьшение масштаба карты
Для того что бы уменьшить масштаб карты, необходимо добавить в стол картографа карту и пустой лист. Уменьшать масштаб карты можно несколько раз. При каждом добавлении листа масштаб будет уменьшаться вдвое. Максимальное уменьшение х16.

Копирование карты
Для того что бы сделать копию существующей карты, необходимо добавить в стол картографа карты и одну чистую карту.
Ламинирование карты
Ламинирование карты позволит Вам зафиксировать положение карты. И даже если вы уйдете за пределы карты, ее внешний вид не изменится.
Для того что бы заламинировать карту, необходимо добавить в стол картографа карту + блок стекла.
Карта в Minecraft — предмет, на котором изображен мир игры и рельеф местности. Некоторые игроки не знают как ее создать. Рассказываем.
Как сделать карту
Карту можно скрафтить на столе картографа. Вам понадобятся следующие материалы:
-
Листы бумаги — 8 единиц;
-
Компас — одна единица.
Бумага делается из тростника. Компас из железных слитков и красной пыли.
Обязательно обратите внимание на то, что сначала исследованную территорию придется изучать, держа карту в руках. Но позже ее можно вставить в рамку — чтобы местность отображалась постоянно.
Кроме того, в аду карта работает только как ориентир, там она не показывает то, что вас окружает.
If you would like to adjust your map or copy it, the cartography table is the crafting station for you. The cartography table is a block in Minecraft that serves a few functions. It is the jobsite block for the cartographer profession for villagers. You can copy maps, make them bigger, rename them, and transform them into locator maps so you can keep track of where you are. The cartography table helps if you are looking to map the terrain of your world.
Cartography Table
| Paper | Paper | |
| Wooden Planks (Any overworld) | Wooden Planks (Any overworld) | |
| Wooden Planks (Any overworld) | Wooden Planks (Any overworld) |
You can mirror the recipe on the other side and still create the cartography table. The planks do not have to be specific and you can mix and match the type of planks to make the cartography table.
Contents
- How to Get a Cartography Table in Minecraft?
- How to Make a Cartography Table in Minecraft?
- How to Use a Cartography Table in Minecraft?
- Trivia
- FAQ
- How do I copy a map in Minecraft?
- How to find woodland mansions in Minecraft?
- How to find Underwater Temples in Minecraft?
- How do I turn my map into a locator map?
How to Get a Cartography Table in Minecraft?
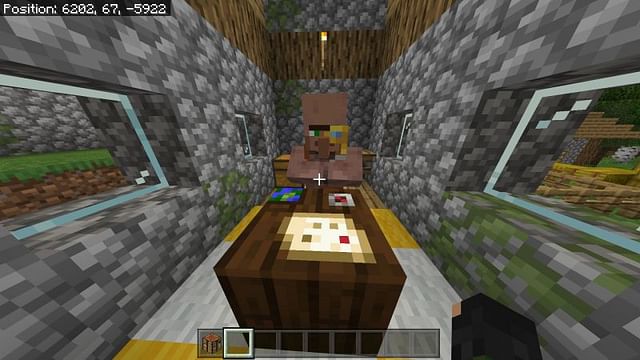
Cartography tables will be naturally generated in some villages. You can distinguish a cartographer’s house by the carpet on the floor and the paper in their chests.
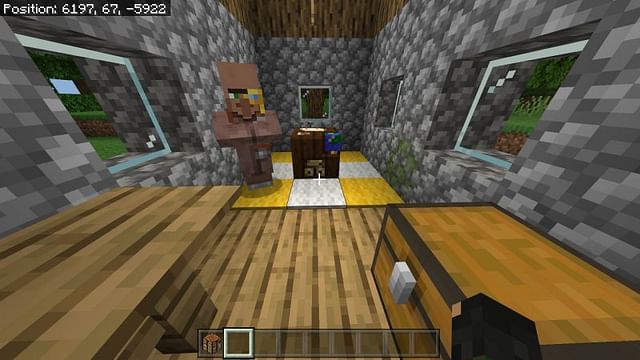
The outside of the home will typically have some flowers planted and a roof made of stairs.

Finding a cartography table can be a lot of effort, it is easier to make one yourself.
How to Make a Cartography Table in Minecraft?
— Two pieces of Paper
— Four Wooden Planks (Of any overworld planks)
To make a cartography table you will need two pieces of paper. You can get paper by turning a row of sugarcane into paper at a crafting table. The four wooden planks do not have to be anything too specific. The recipe does not recognize warped wood or crimson wood, so any wood from the overworld will work just fine. You can mix and match the different kinds of wood to make a cartography table. Place the wooden planks in a 2×2 square in the bottom two spaces of the crafting menu and place two pieces of paper above the planks.
Cartography tables are a cheap recipe that is much easier than finding it naturally generated in the world.
How to Use a Cartography Table in Minecraft?
Right click on a cartography table to open its UI. Here there are two squares on the left which are the inputs and the square on the right is the output.
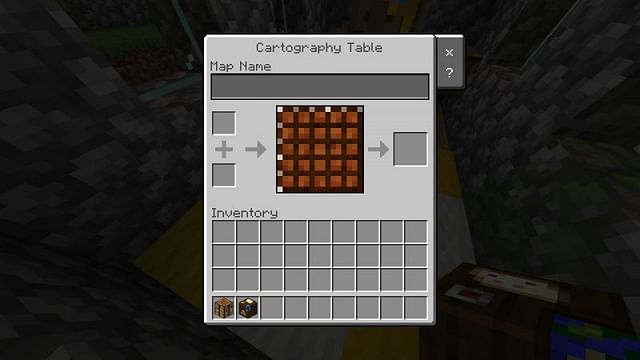
The map name is only present in the Bedrock edition of Minecraft. You can rename the map to simplify what the map’s purpose is. The cartography table can also make an existing map larger.
To make a larger map simply place an already opened map into one of the slots on the left and some paper in the slots as well. Clicking on the output will consume both items on the left and give you a more zoomed out map.
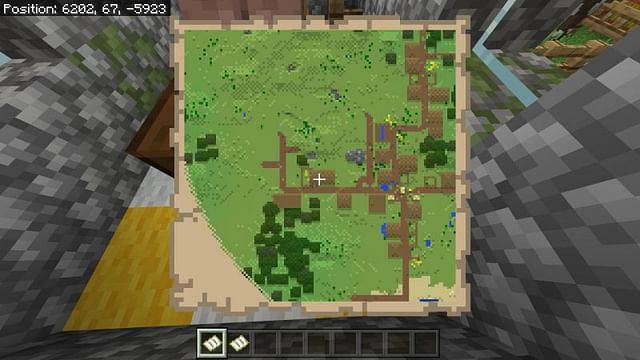
You can do this up to four times. If you would like to add a locator to the map so you can keep track of where the player is on the map you can do so at a cartography table. Add your existing map to the left slot and add a compass to it.
Now the map will show you where the player is on the map as well as where they are facing.
If you are playing on a multiplayer server, the map will also show you the locations of other players as long as they fit on the map. If they do not fit within the boundaries of the map, they will appear at the edges of the map with their own assigned color.
If you want to ensure no further changes to the map you have made you can do so at a cartographer table. Simply add the map you want to lock and add a glass pane to the slot on the left. Once a map is locked you cannot transform it into a locator map.
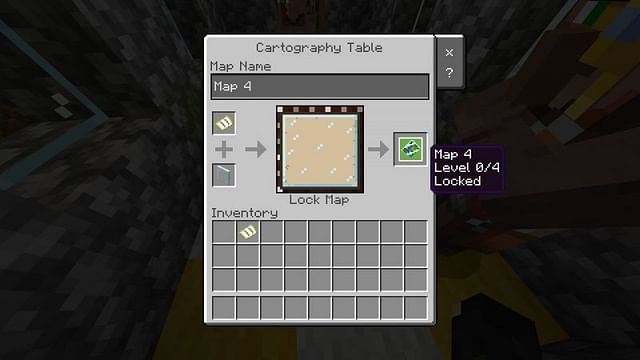
A locked map will also not reveal any extra spaces or change if the environment inside the map changes. This can be useful if you want to document the trail you took to a distant jungle or towards a stronghold.
You can also duplicate maps at a cartography table. Simply take an existing map and an empty map into a cartography table to copy the map into another. If the base map is a locator map, the newly copied map will also be a locator map. If you copy a locked map the newly copied map will also be locked.

Cartography tables are also used as jobsite blocks for cartographers. Cartographers will sell you maps to key places of interest like shipwrecks or the closest woodland mansion.
Trivia
No matter what type of wood you use to make a cartography table, the end result always seems to be made of a dark oak wood.
You can zoom out maps without a cartography table, but zooming out a map requires eight paper whereas a cartography table only requires one.
FAQ
How do I copy a map in Minecraft?
Using a cartography table and placing the map you want to copy with an empty map will copy the map for you.
How to find woodland mansions in Minecraft?
Journeyman level cartographers will sell maps to woodland mansions. These mansions will be marked with a large house icon, most likely in an unexplored region of the world. Using a cartographer can help you save a lot of time tracking down a woodland mansion as these do not generate close to one another.
How to find Underwater Temples in Minecraft?
Like woodland mansions, cartographers will sell you ocean explorer maps. These maps can point you to underwater temples or buried treasure. The maps will be locator maps so you can see which direction you will need to travel and can help you unearth difficult to find locations. Having a cartographer nearby can help give you direction while exploring.
How do I turn my map into a locator map?
Simply place your existing map into a cartography table and add a compass to it. Your map will be transformed into a locator map.